

How to Properly Install Epoxy Grout: A Step-by-Step Guide
Are you ready to elevate your tiling projects with epoxy grout? This versatile and durable product is an excellent choice for a variety of applications, including kitchens, bathrooms, and commercial spaces. Proper installation of epoxy grout is crucial to achieving long-lasting results. In this step-by-step guide, we will walk you through the installation process, ensuring you get the best performance from your epoxy grout.
What is Epoxy Grout?
Before diving into the installation process, let's briefly discuss what epoxy grout is. Epoxy grout is a mixture of epoxy resins and hardeners, making it highly resistant to stains, chemicals, and moisture. Unlike traditional cement-based grouts, epoxy grout provides a durable and non-porous surface, making it ideal for both indoor and outdoor use. Now, let's get started with the proper installation of epoxy grout!

Step 1: Gather Your Tools and Materials
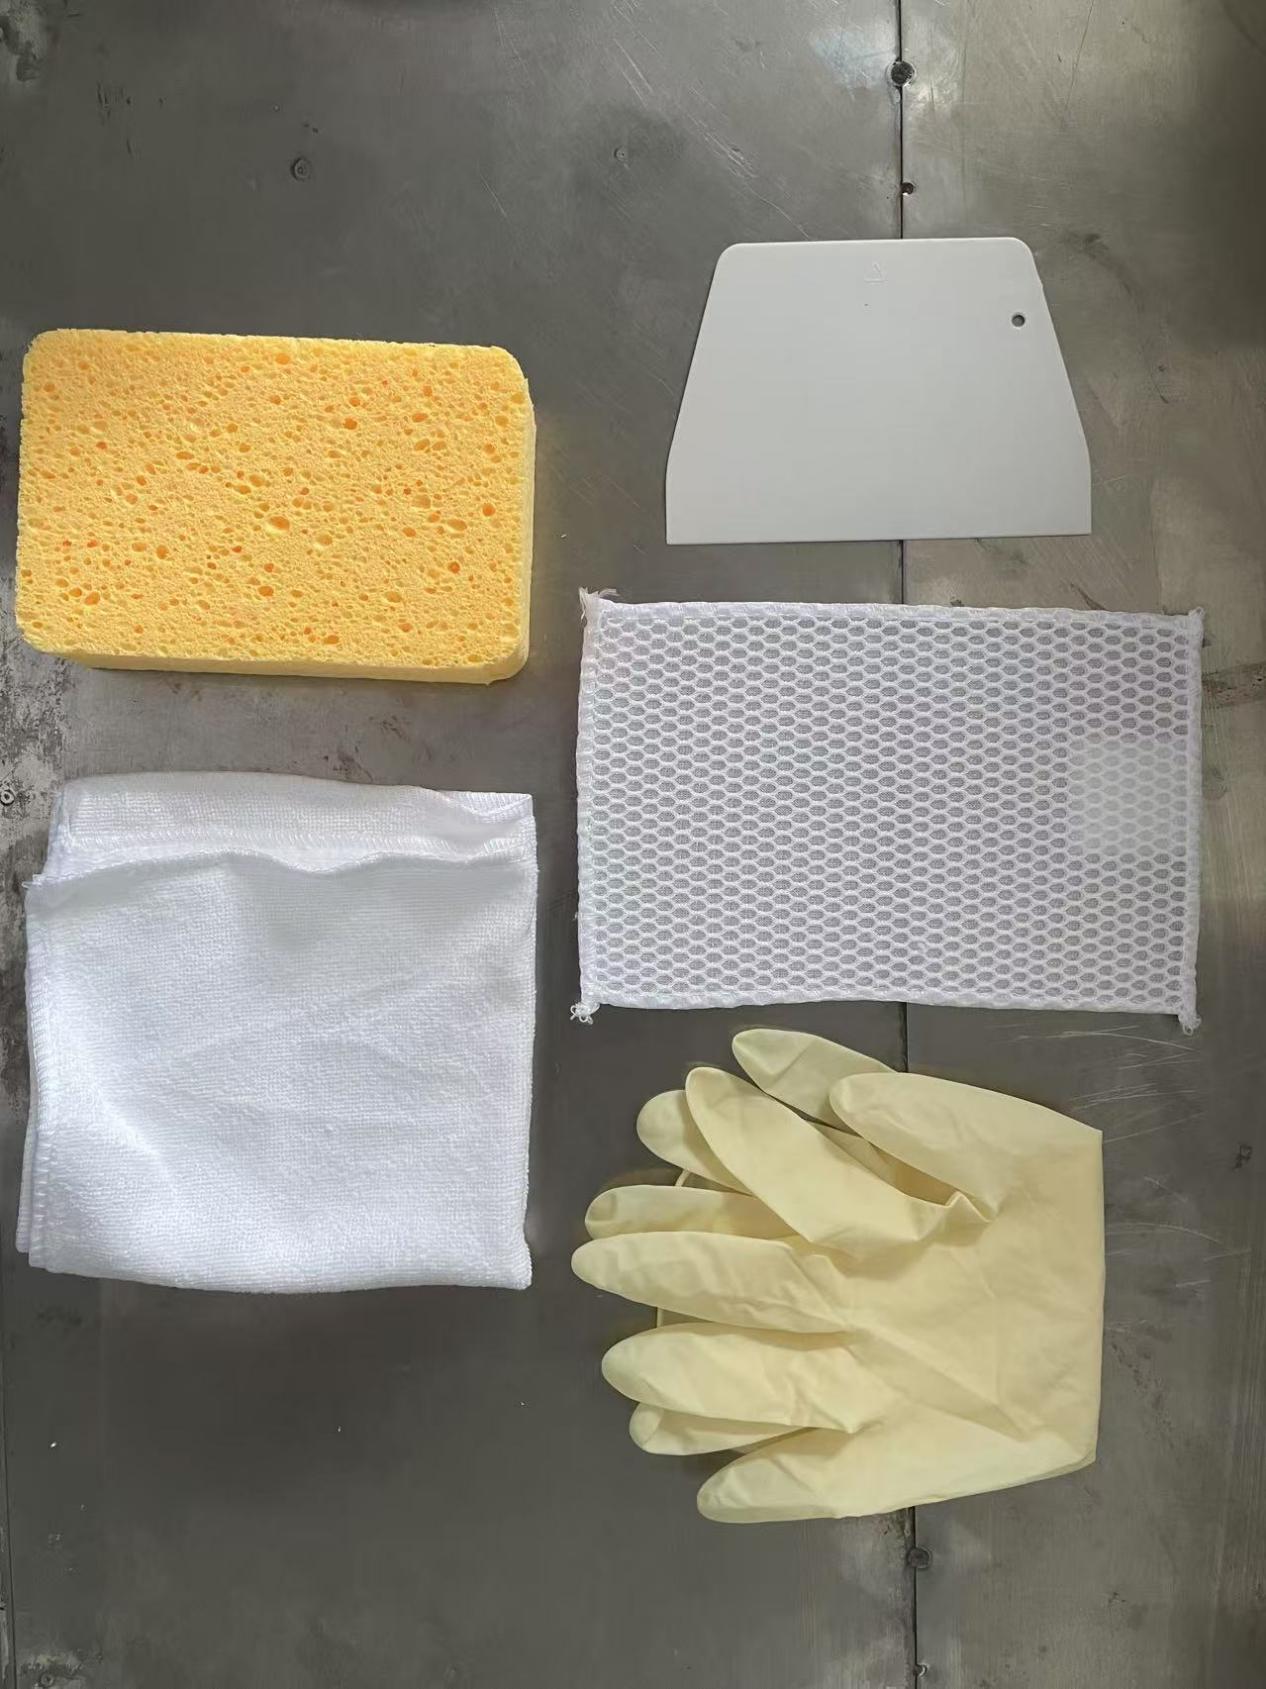
Before beginning your project, it's essential to have all the necessary tools and materials on hand. For installing epoxy grout, you'll need:
Epoxy grout
Mixing tools (bucket, paddle mixer)
Trowel (rubber or notched)
Sponge
Grout float
Utility knife
Sealer (optional)
Protective gear (gloves, mask)
Step 2: Prepare the Surface
Proper surface preparation is critical for the successful installation of epoxy grout. Follow these steps:
Clean the Tile and Joints: Ensure that all tile surfaces are clean and free of dust, dirt, and debris. Use a vacuum or damp cloth to remove any particles.
Check the Joints: Ensure that the joints between the tiles are free of old grout or any contaminants. Any remnants can affect the adhesion of the epoxy grout.
Allow to Dry: Make sure the surface is completely dry before applying the epoxy grout.
Step 3: Mix the Epoxy Grout
Mixing epoxy grout is slightly different from traditional grout due to its resin and hardener components. Follow these steps:
Read the Instructions: Always refer to the manufacturer's instructions for the specific epoxy grout you are using, as mixing ratios may vary.
Combine Components: In a clean bucket, mix the epoxy resin and hardener using a paddle mixer. Ensure that both components are thoroughly combined for optimal performance.
Work Quickly: Epoxy grout has a limited working time, so prepare to apply it promptly after mixing.
Step 4: Apply the Epoxy Grout
With the epoxy grout mixed, it's time to apply it to the joints:
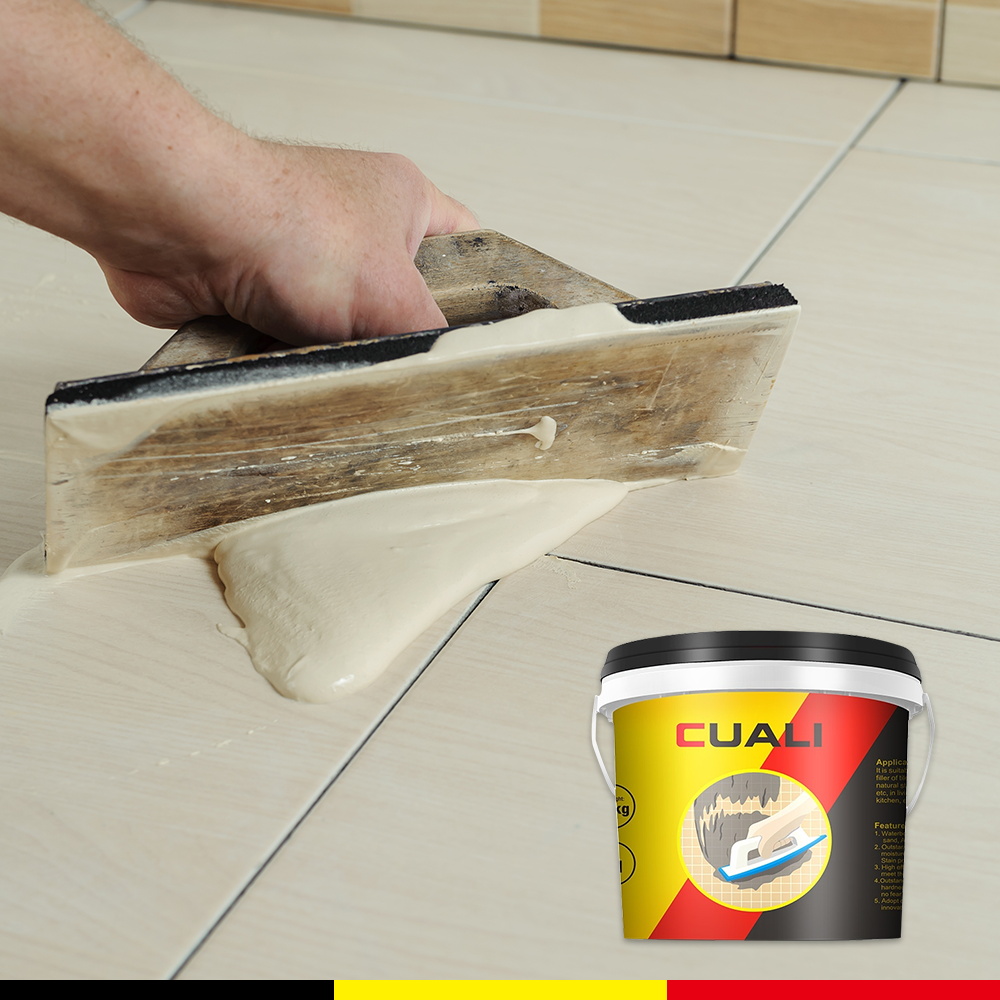
Use a Grout Float: Use a grout float to scoop up the mixed epoxy grout. Hold the float at a 45-degree angle to the surface.
Press and Spread: Press the grout into the joints between the tiles, ensuring that you fill them completely. Use the float to spread the grout diagonally across the tiles, working in small sections.
Avoid Excess: Keep the surface as clean as possible. Remove excess grout from the tile surface as you work to make the cleanup process easier.
Step 5: Clean Up Excess Grout
Once the epoxy grout is applied, cleaning up excess grout is crucial:
Initial Cleanup: Wait about 20-30 minutes for the epoxy grout to set slightly, then use a damp sponge to gently wipe away excess grout from the tile surface. Be careful not to pull grout out of the joints.
Final Cleanup: After the grout has cured for a few hours, use a utility knife to clean the edges of the joints, ensuring a neat finish.
Step 6: Curing Time
Allow the epoxy grout to cure properly. Depending on the manufacturer's guidelines, this may take anywhere from 24 to 72 hours. Avoid exposing the grout to moisture or foot traffic during this period to ensure a solid bond.
Step 7: Optional Sealing
While most epoxy grouts do not require sealing due to their non-porous nature, some may benefit from a light sealer for extra protection. Follow the manufacturer's instructions regarding sealing.
Installing epoxy grout might seem daunting, but by following this step-by-step guide, you can achieve a beautiful, durable finish that will last for years. The advantages of epoxy grout, from its stain resistance to its durability, make it an excellent choice for all your tiling needs. Remember that proper installation is key to maximizing the benefits of epoxy grout. Happy tiling!
Summary:
Are you ready to elevate your tiling projects with epoxy grout? Do you know how to do it? Let's see.
Time:
2025-01-09
More News
HELLO
Please feel free to contact us for more details, there will be a professional team to provide you with satisfactory service
Add
17# Fuze Road, Sanjiao Town, Zhongshan City, Guangdong Province, China
Still have any question?
Get a free consultancy!
You can contact us through phone:
°Ő±đ±ôŁş+86-18988564440&˛Ô˛ú˛ő±č;&˛Ô˛ú˛ő±č;·ˇ-łľ˛ąľ±±ôŁşmarketing@zszlok.com
Contact Us
ĚěĂŔ´«Ă˝
°Ő±đ±ôŁş+86-18988564440
·ˇ-łľ˛ąľ±±ôŁşmarketing@zszlok.com
AddŁşNo. 17 Fuze Road, Gaoping Chemical Park, Sanjiao Town, Zhongshan City
Copyright ? ĚěĂŔ´«Ă˝ All Rights Reserved.
SEO
Powered by www.300.cn